Bead blasting stainless parts: the finish you get and the iron you must avoid
October 16, 2026
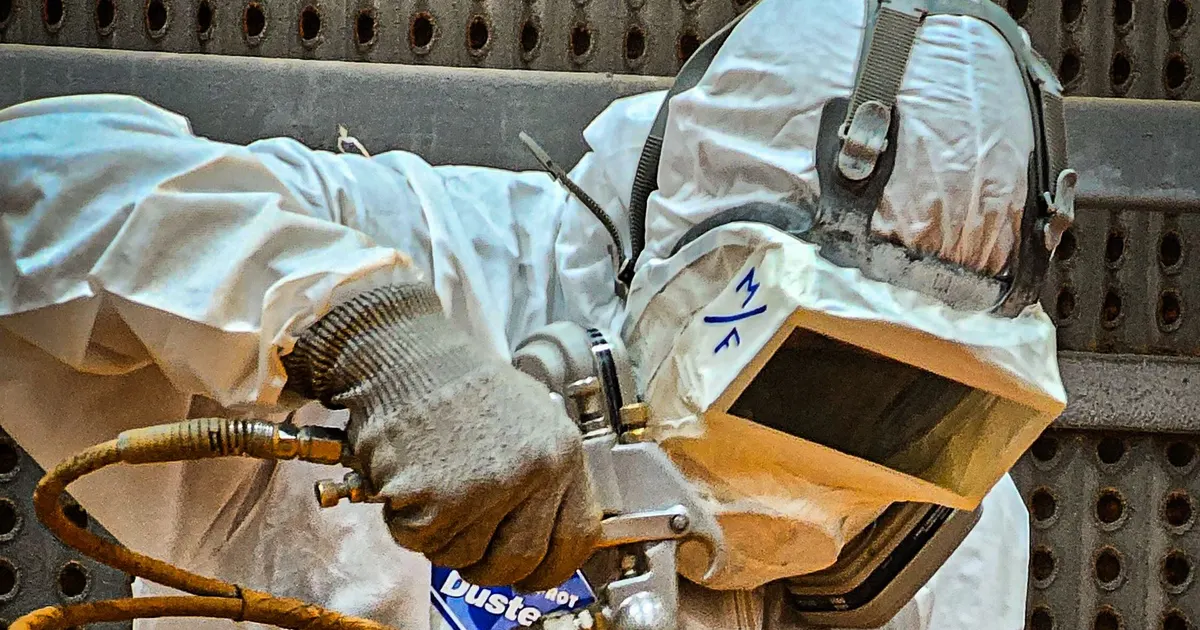
Bead blasting is the fastest way to give a machined stainless part an even, non-reflective surface. It hides tool marks, removes light heat tint and gives the part a consistent satin look. It also changes the surface in ways that matter to corrosion, to fit and to cleaning, and the main risk is contamination. A blasting cabinet that has ever held steel shot can ruin a stainless part in a few seconds.
This guide covers the media choices, the roughness each gives, the dimensional effects and the contamination controls to put in the purchase order.
What bead blasting does to a surface
A stream of compressed air carries small spherical beads against the part. Each impact dents the surface slightly and the pattern of overlapping dents makes a uniform matte texture. The effect on stainless is three things at once:
- Cosmetic. Tool marks, handling scratches and fingerprints disappear. Light-reflecting machined lines become a diffuse satin.
- Mechanical. The impacts peen the surface and leave a thin layer of compressive stress. This can improve fatigue life and resistance to stress corrosion cracking compared with a machined or ground surface.
- Chemical. The peening and any embedded contaminants disturb the passive layer. This is the part that needs controlling.
Blasting does not remove significant burrs. It rounds them slightly and can fold a burr over the edge so it becomes harder to see. Deburring should happen first. The deburring guide compares the methods.
Media choices for stainless
| Media | Typical finish | Roughness, Ra | Risk on stainless | Typical use |
|---|---|---|---|---|
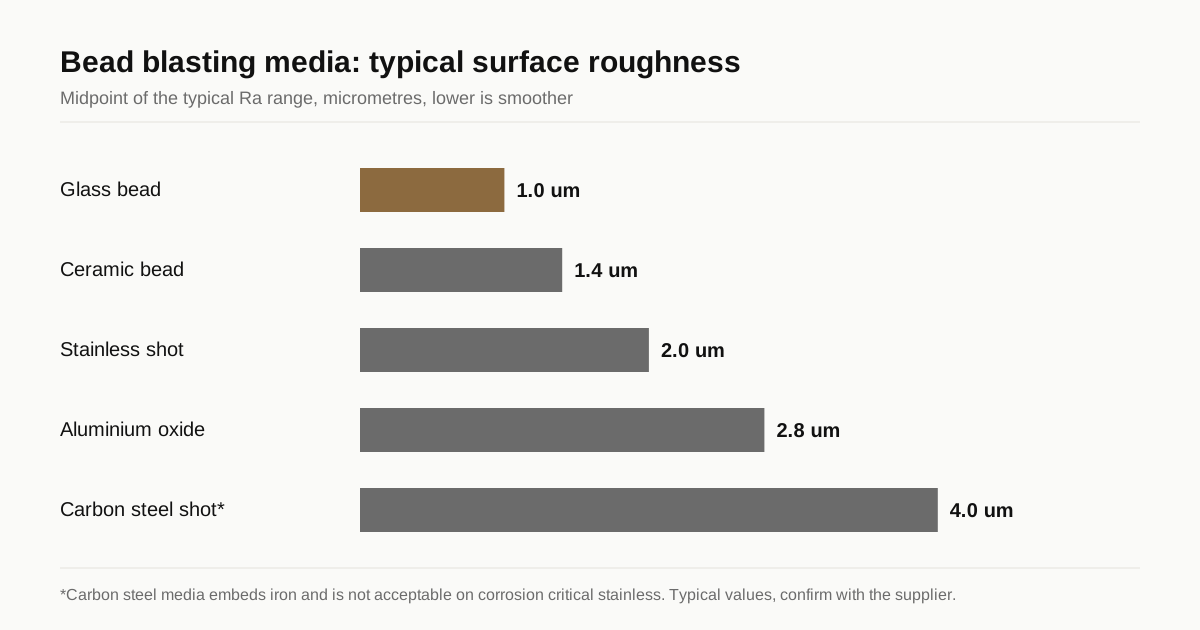
| Glass bead | Smooth satin, soft grey | 0.5 to 1.5 µm depending on bead size | Low, if media is clean and dedicated | Medical, food, cosmetic parts |
| Ceramic bead | Slightly harder satin, longer media life | 0.8 to 2.0 µm | Low | Production parts, heavier cleaning |
| Aluminium oxide | Rough, sharp matt, angular dents | 1.5 to 4 µm | Medium, embeds alumina particles | Surface preparation before coating |
| Stainless steel shot | Smooth peened finish | 1 to 3 µm | Low if truly stainless and dedicated | Peening, high-end finishes |
| Carbon steel shot or grit | Rough and aggressive | 2 to 6 µm | Severe, embeds iron | Not for corrosion critical stainless |
| Walnut shell, plastic | Light cleaning | Almost no change | Very low | Cleaning without changing finish |
Typical values depend on bead size, air pressure, nozzle distance and angle. Confirm the actual roughness with a sample.
The key choice is the media. Glass bead is the default because it is spherical, hard enough to peen but soft enough not to dig, and chemically inert. Use fine beads for a smooth satin and coarser beads for a more matt look. The surface finish guide shows how Ra relates to the finish names used on drawings.
The contamination problem
Free iron is the enemy of stainless corrosion resistance. It enters the surface in blasting in three ways:
- Iron-bearing media. Carbon steel shot or grit leaves iron fragments embedded in the surface.
- Cross-contaminated media. Glass bead used earlier on carbon steel carries iron particles from that work. After a few cycles the media contains iron dust from the earlier parts.
- Dirty cabinets. A blasting cabinet with rust on the wall, grating or glove ports sheds iron into the stream.
Embedded iron rusts in moist air, and the orange spots look like the stainless is corroding. In reality the stainless is fine but the iron is not, and the spots can seed pitting in chloride environments. Medical and food parts with this problem are usually scrapped or reprocessed.
Controls the buyer can require:
- Dedicated cabinet and media for stainless work only.
- Media change or screening on a stated schedule, because broken beads and fines hold contamination.
- Post-blast cleaning with air blow-off and a rinse to remove dust.
- Passivation to ASTM A967 after blasting, which dissolves free iron.
- Verification. Water immersion, humidity cabinet or ferroxyl tests described in the cleaning and passivation standards. The citric versus nitric guide covers the passivation options.
Effects on dimensions and features
Bead blasting is gentle on dimensions, but it is not free.
| Feature | Effect | What to do |
|---|---|---|
| Outside diameter | Loses a few micrometres, may grow slightly through peening | Allow ±0.01 mm or state tolerance after blasting |
| Threads | Rounded crests and altered fits | Mask threads or blast before threading |
| Sealing faces | Rougher, less sealing-friendly | Mask sealing faces |
| Thin walls | May bow from peening stress | Test a sample, reduce pressure |
| Sharp edges | Slightly rounded | State edge break range |
| Marked areas | Laser marks fade or widen | Mark after blasting, or re-mark |
Masking costs money, so group the surfaces that must stay machined and tell the shop on the drawing which are blasted and which are not. The tolerance guide shows how tight dimensions interact with finishing steps.
Roughness and cleanability
A blasted surface is rougher than a ground or electropolished one, and the fine pits trap residues. That matters for food and medical parts that have to be cleaned.
- A typical glass bead finish gives Ra 0.5 to 1.5 µm and good cleanability for most general uses.
- Parts to hygienic standards usually require a smoother, continuous finish, so electropolishing after blasting, or instead of it, is common. The passivation versus electropolishing guide explains how electropolishing smooths and cleans the surface.
- A blast followed by electropolishing gives a satin look with a clean, passivated surface.
For surfaces that touch product, check whether the standard allows a blasted finish at all. The food contact guide explains how grade and finish interact for product contact parts.
Need a quote for this part? Get a quote for your stainless parts
How the drawing should describe the finish
A note such as “bead blast” is not enough. A good specification includes:
- Media type and size: for example glass bead, 150 to 250 µm.
- Target finish: satin, uniform, no tool marks visible at arm’s length, Ra 1.0 µm maximum.
- Areas excluded: threads, sealing faces, bores.
- Contamination control: dedicated stainless media and cabinet, passivation to ASTM A967 after blasting.
- Sequence: deburr, bead blast, passivate, inspect.
- Sample approval: an approved sample or master piece.
Include acceptance criteria that can be checked, for example no visible iron stain after a 24-hour water immersion test.
Common problems and their causes
- Orange spots after a few days. Iron embedded from steel media or a contaminated cabinet.
- Uneven finish. Inconsistent nozzle distance or pressure, or worn media.
- Dark, dull patches. Blasting over heat tint or oil that was not cleaned first.
- Distorted thin parts. Peening stress on one side only.
- Shadowed areas. Complex shapes where the stream cannot reach.
Ask the shop how they control each of these. A shop that cannot answer is one to avoid for stainless work that must stay corrosion free.
Acceptance checks for a blasted finish
A finish that cannot be checked will be argued about. Four checks cover most buyers.
- Appearance against a master. An approved sample, kept sealed, defines the satin level. Compare parts to it under the same light. Words such as uniform and satin mean different things to different people, so the master settles it.
- Roughness measurement. A stylus profilometer gives Ra, usually at three readings on a flat surface of the part. On small or curved parts, blast a coupon in the same run and measure that.
- Free iron test. A water immersion or humidity exposure test, or the ferroxyl test in the cleaning standards, shows iron contamination. Run it on blasted and passivated parts before shipment on the first lot and on a sample from later lots.
- Dimensional check. Measure critical diameters and thread fits after blasting and passivation, not before. The finish changes the size by a few micrometres.
Questions to put to the shop
Shops that blast stainless regularly will answer these without hesitation.
- Is the cabinet and the media dedicated to stainless, and how is that enforced?
- How often is the media changed or screened, and how do you know when it is spent?
- What air pressure, nozzle distance and angle do you use for this finish, and how do you hold them constant?
- How do you mask threads and sealing faces?
- Do you clean and passivate after blasting in house, or send parts out?
- Can you show a sample in the same grade and finish?
If a shop cannot say whether its cabinet has ever blasted steel, treat that as an answer. The vetting questions in the machine shop vetting guide apply here too. A blasting job is cheap compared with the cost of a lot of rusty parts, so the extra question at quote stage is worth asking.
Blasting small parts and thin parts
Small parts need different handling from large ones. In a cabinet they are loose and can be thrown by the stream, so shops use baskets, tumbling barrels or hold them in fixtures. Fixtures must be stainless or plastic, since a carbon steel fixture rubbed by the stream sheds iron onto the parts. Thin parts distort easily, because the peening on one face stretches that face. A blast on both faces at the same pressure balances the effect, and a lower pressure with finer beads reduces it. If a thin part must stay flat, ask for a trial piece and measure the flatness before and after.
Checklist before you request a quote
- Specify media, size, target Ra and appearance.
- Mark areas to mask.
- Require dedicated stainless media and cabinet.
- Call for passivation to ASTM A967 after blasting.
- State a verification test and an approved sample.
When you send the drawing through the RFQ form, we send one itemised quote within 24 business hours and place the work with partner shops that finish stainless parts. We do not blast parts ourselves.
Frequently asked questions
Which media is safe for blasting stainless steel?
Clean glass bead and ceramic bead are the usual choices, plus aluminium oxide for a more matt, rougher finish. Steel shot and steel grit are not acceptable on parts that must resist corrosion, because they embed iron in the surface. Media should be dedicated to stainless work.
Does bead blasting change part dimensions?
Slightly. Glass bead blasting removes very little material, typically a few micrometres, but it can raise the surface by peening and roughen it. Threads, sealing faces and tight bores should be masked or the tolerance allowance stated on the drawing.
Do I need to passivate after bead blasting?
For parts that must resist corrosion, yes. Blasting disturbs the passive film and can leave traces of iron or other contaminants. A passivation treatment to ASTM A967 after blasting restores the surface. Glass bead blasting followed by passivation is a common finish for medical and food parts.
Need a quote for this part?
Send the drawing. We read it, send one itemised quote within 24 business hours and place the work with a partner shop that cuts stainless.
Get a quote for your stainless partsFigures in this guide are published specification limits or published typical values for the alloy, not measurements of any part. Machinability is rated against free-machining carbon steel B1112 at 100 and PREN is chromium plus 3.3 times molybdenum plus 16 times nitrogen. The conventions are set out in thereference section and the editorial standards.