Final cleaning of machined stainless parts: the steps between the machine and the bag
October 17, 2026
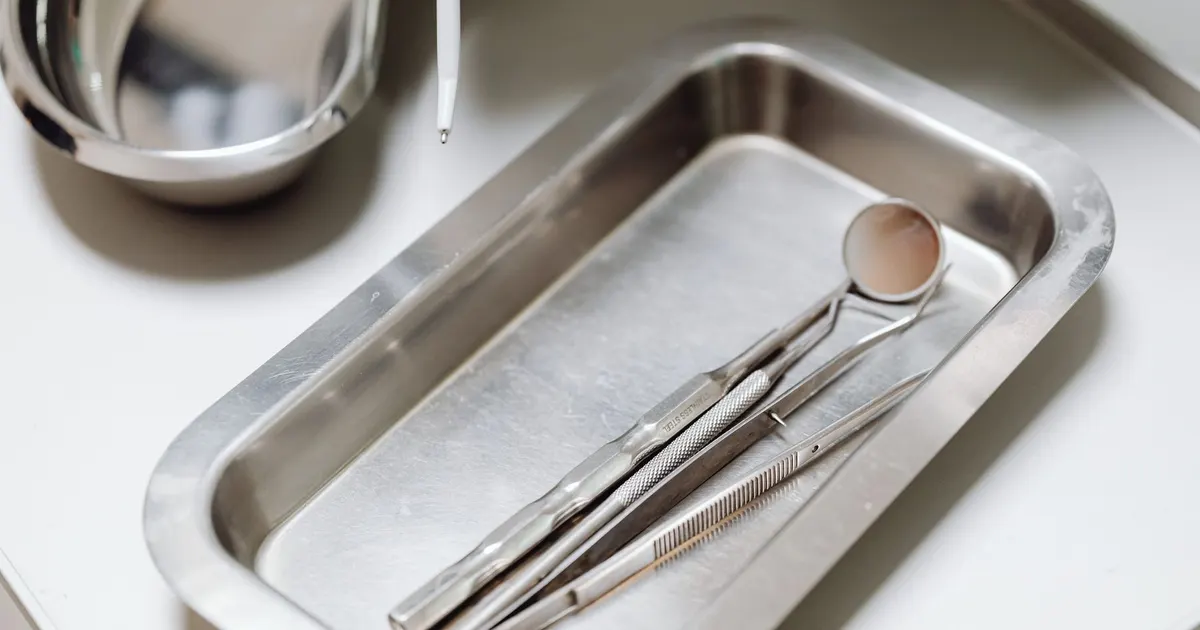
A machined stainless part comes off the lathe coated in coolant, oil, metal fines and fingerprints. For a bracket in an industrial machine that does not matter. For a part that goes into a medical device it does, because those residues can block a channel, interfere with a bond, show up in extraction testing or carry bioburden into the next step. Cleaning is the process between the last cut and the clean bag, and it is the part most often under-specified on a drawing.
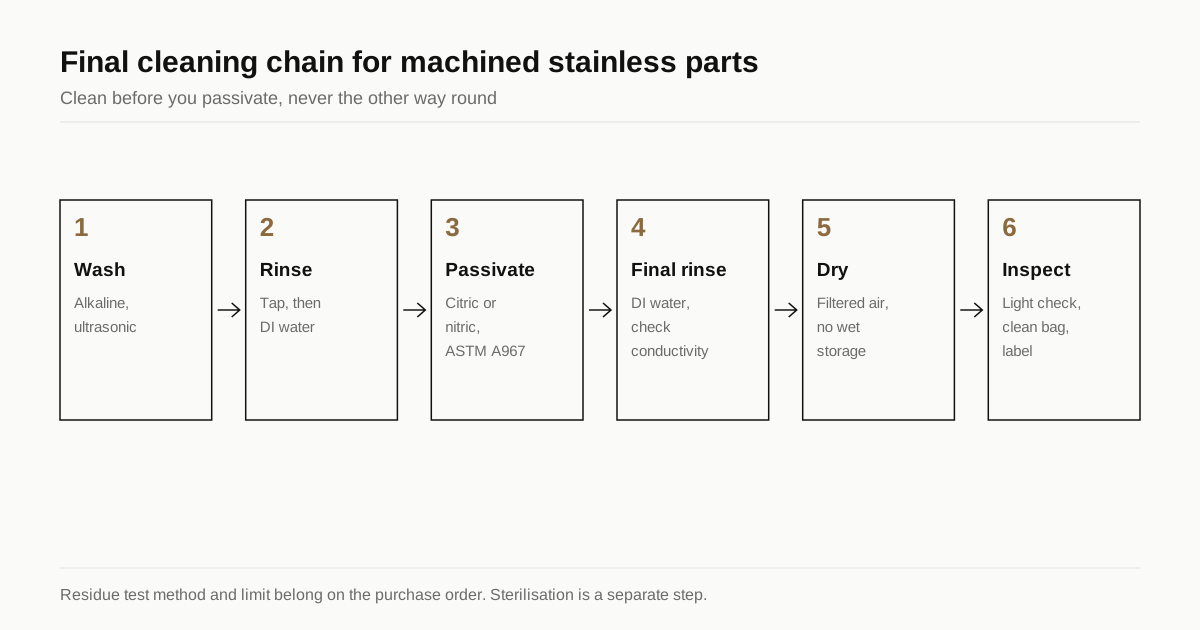
This guide describes the usual cleaning chain for machined stainless, the checks that show it worked and the wording to put on a purchase order. It applies to instruments, housings and device components. We make no medical claims. What a given device needs depends on its class, its use and its own quality system.
What is on a freshly machined stainless part
| Contaminant | Source | Why it matters |
|---|---|---|
| Cutting fluid and oil | Coolant, tapping oil, way lube | Film on surfaces and in blind holes |
| Metal fines and chips | Cutting, drilling, deburring | Particles in holes and threads |
| Abrasive and media residue | Tumbling, blasting, polishing | Embedded particles |
| Free iron | Tools, brushes, handling | Rust spots, pitting seed |
| Fingerprints and salts | Handling | Staining, residue on assay |
| Polishing compound | Buffing | Waxy residue, hard to remove |
Blind holes, threads, cross holes and tight gaps are where residues stay. A part that looks clean can still release particles later.
The usual cleaning chain
Shops that clean stainless medical parts regularly follow a sequence like this. The details differ, so ask for the shop’s own procedure.
- Pre-clean or dry wipe. Remove bulk chips and coolant with air and lint-free wipes.
- Main wash. Aqueous alkaline cleaner in an ultrasonic bath or spray washer, or a vapour degreaser with a modified alcohol or a hydrocarbon solvent. Time and temperature depend on the part.
- Ultrasonic agitation. High-frequency cavitation lifts oils and particles out of holes and threads.
- Rinse. Tap water first, then deionised or reverse osmosis water to remove salts and cleaner.
- Passivation. Citric or nitric acid treatment to dissolve free iron and rebuild the passive layer. The citric versus nitric guide compares the methods.
- Final rinse. Deionised water, with the conductivity of the rinse checked.
- Drying. Filtered hot air or vacuum drying. Wet parts left in the open rust and stain.
- Inspection under light. Visual check, sometimes at magnification, for residue and particles.
- Packaging. Clean polyethylene bag or tray, sealed, with a label and lot number.
Some work calls for a final ultrasonic rinse in isopropyl alcohol or a second cleaning cycle. Parts that were electropolished or bead blasted need cleaning after those steps too. The passivation versus electropolishing guide explains how electropolishing leaves a cleaner surface that is easier to wash.
Which step removes what
| Step | Removes | Does not remove |
|---|---|---|
| Alkaline ultrasonic wash | Oils, coolant, light particles | Embedded iron, scale |
| Solvent vapour degrease | Oils, waxes, greases | Salts, particles stuck in dry residue |
| Passivation | Free iron, light oxide | Oils, particles |
| Electropolish | Thin surface layer, embedded particles | Oils on blind surfaces if not washed |
| DI water rinse | Salts and cleaner residue | Oils, adherent particles |
| Filtered air dry | Water | Residues |
The point of the table is the sequence. Passivation on an oily part does not work well, because acid cannot reach the metal under the oil. The sequence is cleaning, then passivation, then rinse.
Process aids that cause trouble
A few choices upstream make cleaning easier or harder:
- Cutting fluid. Water-soluble coolants that rinse cleanly are easier than heavy sulphurised cutting oils. If the part will be cleaned in a medical process, state any restrictions on cutting fluids, for example no chlorinated or sulphurised oils.
- Deburring and finishing. Abrasive media embedded in the surface or trapped in blind holes can come out later. The deburring guide covers the options.
- Tools and brushes. Carbon steel contamination must be avoided from the start.
- Handling. Gloves, lint-free handling and clean trays between operations prevent fingerprints and salts.
How to prove the part is clean
A visual check is the minimum. Anything more depends on the device. Common tests you can name on the drawing or in the purchase specification:
| Test | What it shows | Notes |
|---|---|---|
| Visual inspection under defined light | Gross residue, particles | Define the light and distance |
| Water break test | Oil film on the surface | Water sheets on a clean surface and beads on an oily one |
| Gravimetric residue (for example ASTM F2459 for extractable residue) | Total residue mass | Needs a lab, time and a defined solvent |
| Particle count of rinse water | Particles released from the part | Reports counts by size band |
| Ionic contamination | Salts and cleaner residue | Conductivity of rinse water |
| Ferroxyl or copper sulphate test | Free iron | Linked to passivation acceptance |
Name the standard or method you want, state the acceptance limit and say how many parts are tested per lot. A limit with no method is not checkable. Check which methods apply to your device class with your own quality or regulatory advisor. For orthopaedic implants there are standards on cleanliness, for example ISO 19227, and the shop must be told if the part falls into that category. We do not claim any of this for our partner shops.
Need a quote for this part? Get a quote for your stainless parts
What a machine shop normally does and does not do
Be clear about the boundary at quote stage.
Usually included: washing, passivation, rinsing, drying, visual inspection and clean packaging in a bag.
Often an extra: cleaning in a controlled area, double bagging, residue testing, particle counts, nitrogen purging, lot-specific cleaning records.
Rarely done by the machining shop: sterilisation, endotoxin testing, bioburden testing, cleanroom classified production. If the device needs these, the buyer or a specialist provider usually carries them out, and the purchase order should say who does what.
An ISO 13485 or ISO 9001 certificate tells you something about the shop’s documented system, but not about its cleaning method. Ask for the procedure and for a sample cleaning record.
What to write on the drawing and purchase order
A short note makes the expectation clear:
- Clean and passivate per ASTM A967 after final machining and finishing.
- Cleaning residues removed from all internal features, threads and blind holes.
- Final rinse in deionised water, conductivity below a stated limit.
- Dry with filtered air. No wet storage.
- Inspect visually under 1000 lux light at 300 mm. No visible residue, oil or particles.
- Pack in clean sealed polyethylene bags, one lot per bag, with lot number.
- Residue test per a named method on a stated number of parts per lot.
If the part has features that trap fluid, such as small blind holes, mention them on the drawing. A hole that cannot drain or be reached by the cleaner will hold residue.
Common failure points
- Passivating before cleaning. Oil blocks the acid.
- Reusing cleaning baths too long. Contamination builds up and redeposits.
- Slow drying. Water spots and rust staining.
- Mixed batches. Stainless parts washed with other metals pick up foreign particles.
- Skipping the final inspection. Visible fines in threads discovered by the customer.
Handling and storage after cleaning
A part that leaves the washer clean can be contaminated again in minutes. The weak points are drying, handling and the bag.
Drying. Wet stainless left in a tray can stain or show water spots, and chloride in tap water leaves a residue. Parts should go from the final rinse to filtered air or a drying oven without waiting.
Handling. Gloves that are lint free and clean, and trays that have not held other work, prevent fingerprints and salt transfer. Bare hands deposit chloride that can start spotting on a polished surface.
Packaging. A clean polyethylene bag is the usual first layer. Some customers want parts bagged individually, others in lots. Very small parts that scratch each other need trays or foam separators. Desiccant and a humidity indicator are an option for long transit by sea.
Storage. Keep parts away from carbon steel, grinding dust and cutting oils. A shelf next to a grinder is a poor place for passivated stainless.
Labelling. Lot number, quantity, part number and revision on the label tie the bag to the certificate. Mixed lots in one bag defeat traceability.
Validation versus routine checks
Medical manufacturers often validate a cleaning process once, with extensive testing, and then run routine checks on each lot. The machine shop’s role depends on which it is.
- Validated process. The buyer writes or approves the cleaning procedure, and the shop follows it without change. Any change to chemistry, time or equipment needs the buyer’s approval. The shop keeps records of each batch.
- Routine checks only. The shop uses its own standard process and applies the agreed tests to a sample from each lot.
Say which applies in your RFQ, because it changes what the shop can quote. A validated process locks the shop into a method, and shops that have not done it before need time to set up. Lead times and cost are higher than for a standard wash and visual check. If your device falls under a quality system that requires validated cleaning, raise it at the first conversation rather than after the first parts arrive.
Checklist before you request a quote
- Define the cleaning sequence and its order after finishing.
- Name the passivation standard.
- State the cleanliness test and acceptance limit.
- Say what the shop does and what you do yourself, for example sterilisation.
- Require clean packaging and lot traceability.
When you send the drawing through the RFQ form, include the cleaning note. We send one itemised quote within 24 business hours and place the work with partner shops that clean and pack stainless parts. We are not a cleaning facility.
Frequently asked questions
Is passivation the same as cleaning?
No. Passivation is a chemical treatment that removes free iron and builds up the passive film. It does not remove oils, coolant or particles, so the part must be cleaned before passivation and rinsed carefully after it.
How do I prove a part is clean?
Ask the shop to state a cleanliness test and an acceptance limit. Common options are a gravimetric residue test, a water break test, a particle count of the rinse water and visual inspection under defined light. The method depends on the device and on your own quality system.
Does a machine shop clean parts to final sterile condition?
Normally no. A machine shop cleans parts to remove manufacturing residues. Sterilisation, bioburden control and cleanroom packaging are separate steps, usually done by the device manufacturer or a specialist, and they must be agreed and priced separately.
Need a quote for this part?
Send the drawing. We read it, send one itemised quote within 24 business hours and place the work with a partner shop that cuts stainless.
Get a quote for your stainless partsFigures in this guide are published specification limits or published typical values for the alloy, not measurements of any part. Machinability is rated against free-machining carbon steel B1112 at 100 and PREN is chromium plus 3.3 times molybdenum plus 16 times nitrogen. The conventions are set out in thereference section and the editorial standards.